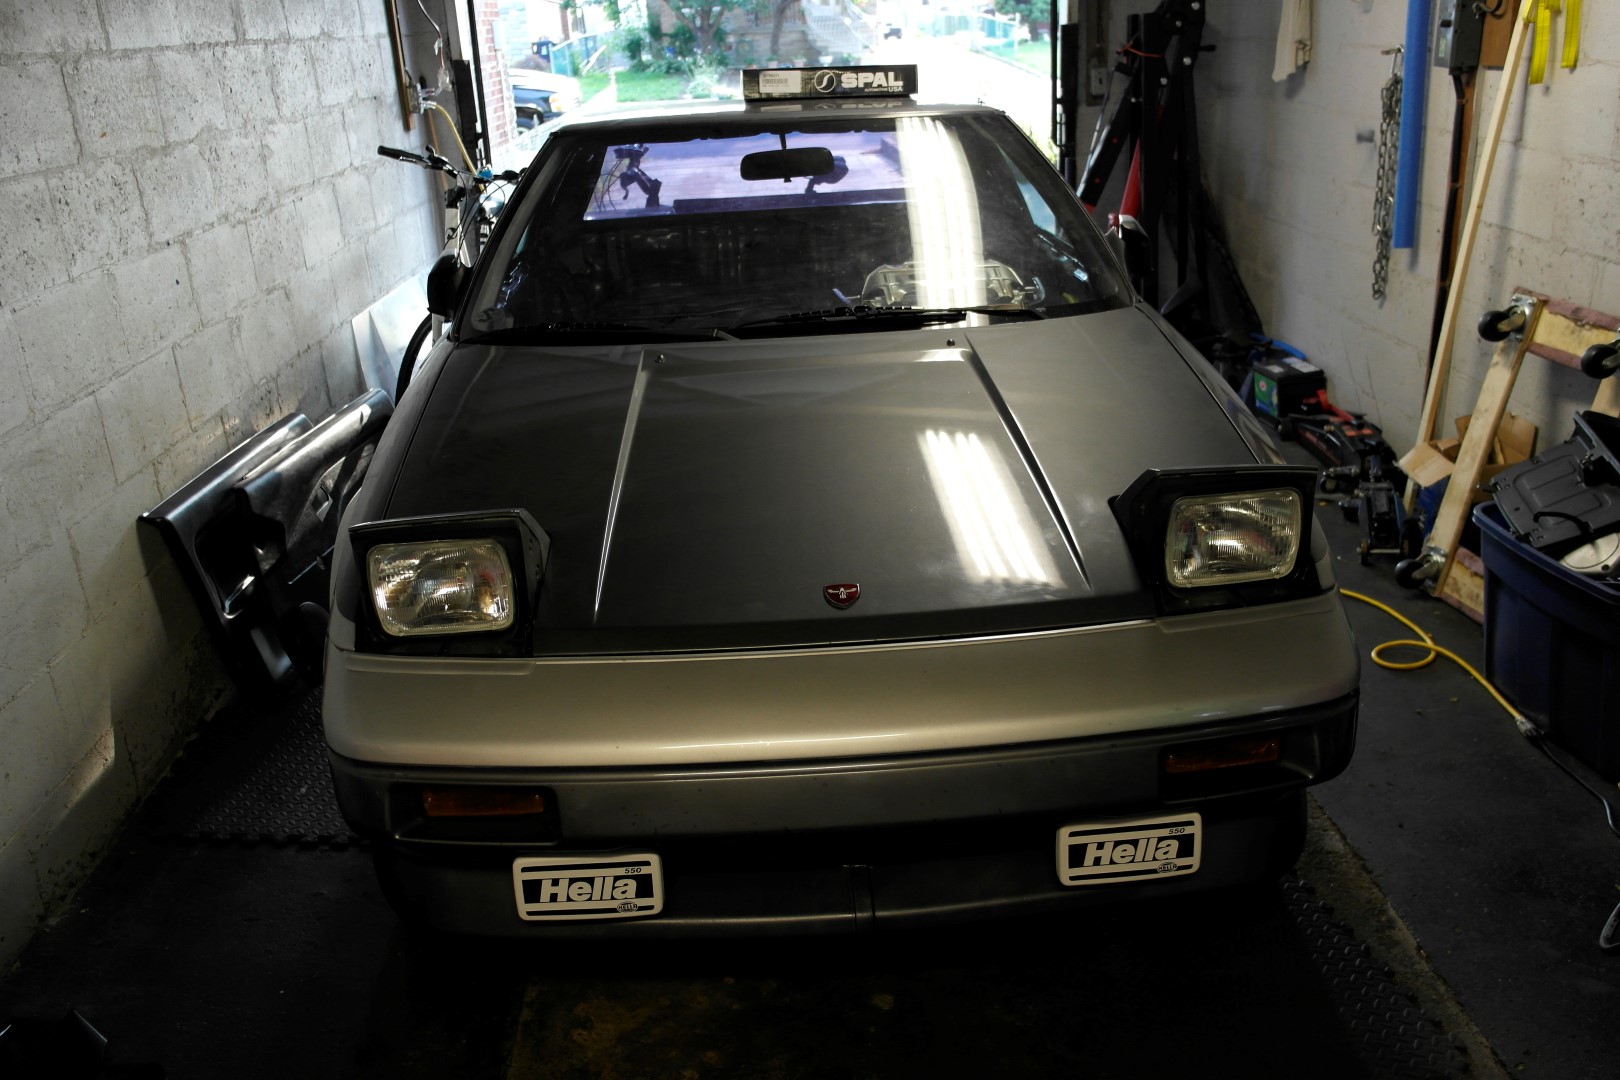
Adding front fog lights to the MR2:
I wanted to add fog-lights to my MR2 as I find that the stock lights are lacking in terms of output, and furthermore, I have seen several MR2’s with fog lights added which looked very aesthetically pleasing. The circuit is very simple, and the wiring was simplified even further with the relocation of the battery to the front of the vehicle,
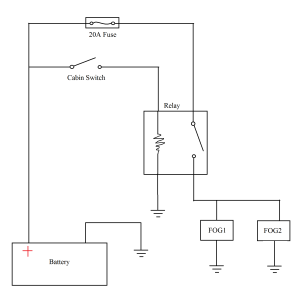
A simple electrical switch mounted in the cabin activates the relay which then provides continuous power from the battery to the fog lights. Since I have chosen the Hella 550 fog lights which operate at 12V with a power consumption of 55W (each) my circuit amperage will be 9.17A. Therefore a 15A fuse has been placed inline with the lights to prevent any over-current. The wire gauge based on this requirement (15A) and roughly 5-10 feet of wire is 14 gauge.
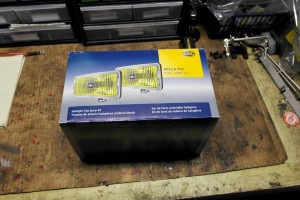
The Hella 550 fog lights come as a kit with everything needed to complete the wiring of the above circuit. The circuit fuse is even integrated within the relay to simplify things. The lights need to be assembled (bulbs placed in housing) and the wiring needs to be laid out, measured, and cut to size. The connectors for the wiring connections also need to be soldered on. The relay is mounted below the other power relays on the custom bracket that I welded in place in the frunk. The power wires (2 black wires) for the fog lights run around the frunk and through a small hole drilled in the front of the car, next to the radiator.


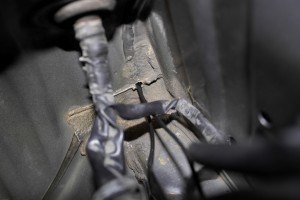
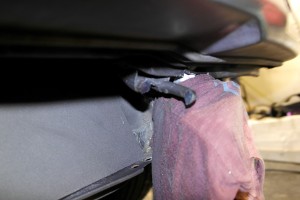
The hardest part of this job is the mounting of the fog lights. There are no appropriate solid points at the front of the car to drill a hole for mounting the lights. Initially I was going to fabricate a bomber bar that spanned the entire front of the vehicle and would provide a solid mounting point for the lights. However, after further consideration I abandoned this idea in place of something much simpler. I decided to fabricate two angle brackets which are mounted at the location of the main bumper bolts on either side of the radiator.
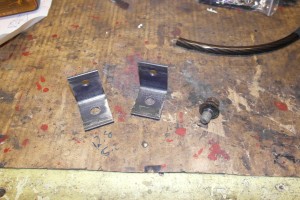

The brackets are tight, and they sit flush with the underside of the bumper. This unfortunately provides no clearance for the bolts of the fog lights. So, the solution was to drill a clearance hole into the bumper itself such that the mounting bolts for the fog lights would fit. Some grinding was first done, and then the holes were drilled/ground.


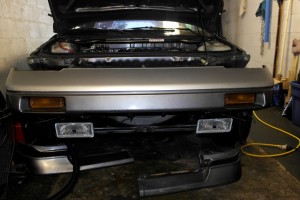
The fog lights were wired up, and mounted. They come with protective plastic covers which should come in handy and prevent damage while not in use. The ground points for the lights were two bolts at the front of the car which appear to have no function. They do not fasten anything and don’t hold anything down, and they were conveniently placed, just my luck I suppose.


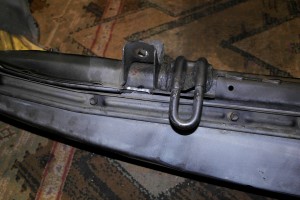
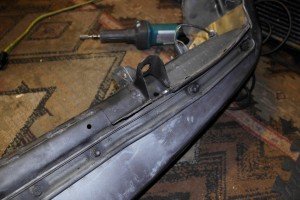
After re-installing the front bumper and valence I discovered that the driver side fog needed to be adjusted, however it was prevented from doing so by the front tow hook. I was forced to cut the tow hook off using an angle grinder so the front valence could be put back on.


Adding front fog lights to the MR2:
I wanted to add fog-lights to my MR2 as I find that the stock lights are lacking in terms of output, and furthermore, I have seen several MR2’s with fog lights added which looked very aesthetically pleasing. The circuit is very simple, and the wiring was simplified even further with the relocation of the battery to the front of the vehicle,


A simple electrical switch mounted in the cabin activates the relay which then provides continuous power from the battery to the fog lights. Since I have chosen the Hella 550 fog lights which operate at 12V with a power consumption of 55W (each) my circuit amperage will be 9.17A. Therefore a 15A fuse has been placed inline with the lights to prevent any over-current. The wire gauge based on this requirement (15A) and roughly 5-10 feet of wire is 14 gauge.
The Hella 550 fog lights come as a kit with everything needed to complete the wiring of the above circuit. The circuit fuse is even integrated within the relay to simplify things. The lights need to be assembled (bulbs placed in housing) and the wiring needs to be laid out, measured, and cut to size. The connectors for the wiring connections also need to be soldered on. The relay is mounted below the other power relays on the custom bracket that I welded in place in the frunk. The power wires (2 black wires) for the fog lights run around the frunk and through a small hole drilled in the front of the car, next to the radiator.


The hardest part of this job is the mounting of the fog lights. There are no appropriate solid points at the front of the car to drill a hole for mounting the lights. Initially I was going to fabricate a bomber bar that spanned the entire front of the vehicle and would provide a solid mounting point for the lights. However, after further consideration I abandoned this idea in place of something much simpler. I decided to fabricate two angle brackets which are mounted at the location of the main bumper bolts on either side of the radiator.


The brackets are tight, and they sit flush with the underside of the bumper. This unfortunately provides no clearance for the bolts of the fog lights. So, the solution was to drill a clearance hole into the bumper itself such that the mounting bolts for the fog lights would fit. Some grinding was first done, and then the holes were drilled/ground.


The fog lights were wired up, and mounted. They come with protective plastic covers which should come in handy and prevent damage while not in use. The ground points for the lights were two bolts at the front of the car which appear to have no function. They do not fasten anything and don’t hold anything down, and they were conveniently placed, just my luck I suppose.


After re-installing the front bumper and valence I discovered that the driver side fog needed to be adjusted, however it was prevented from doing so by the front tow hook. I was forced to cut the tow hook off using an angle grinder so the front valence could be put back on.