How to fabricate your own battery cables:
As part of the frunk relocation of the battery, new cables need to be produced to run the power back to the engine in the rear. As I was being ambitious and implementing another cabin circuit for my new amplifier, as well as new inline fuses and power distribution blocks, I needed to fabricate several new power cables of different gauges.
There are several tools which make this job easy and painless, without them, I can imagine the quality of the finished product suffering and the level of frustration increasing. Let’s go through the process and which tools I’m talking about.
1. Cut the appropriate gauge wire to length. To prevent wasted wire, I used a rope to measure out exactly what I needed by laying the rope along the desired path. Size the wires to the appropriate current it will be carrying.
2. Strip the end of the wire using a sharp x-acto knife. Try not to cut too vigorously to prevent breaking the copper strands beneath the protective layer.
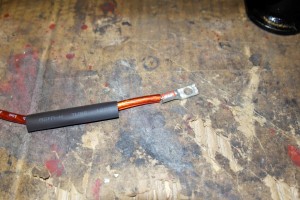
3. Slip some shrink-tubing of the appropriate size on to the wire. This will be used to clean up and insulate the lug-connectors that will be crimped on next.
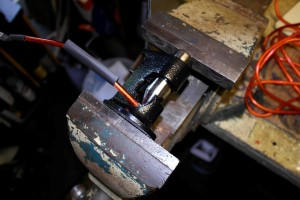
4. Slide the correct compression lug (purchased from Mcmaster Carr) on to the stripped end of the wire. Place the lug and wire into the hammer crimper. Note, this tool was well worth the $30 investment. However, I say this with a caveat. Do not use this tool with a hammer, instead, place the assembly in a large vise and squeeze to form the crip in a controlled manner. Using this method, the crimps come out beautifully and are solid.
5. Slide the shrink-tubing over the new connection and shrink it using a heat gun. I personally have a Weller heat gun which I love.
With the right tools, creating a professional quality battery wire is easy and painless.


